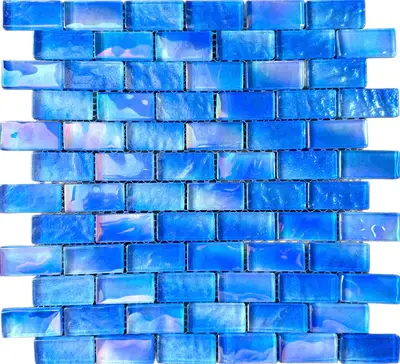
Installing Blue Gray Pattern Pool Tile can transform your pool into a stunning oasis. Whether you’re aiming for a sleek modern look or a more classic style, this tile can add the perfect touch. However, achieving a professional finish requires careful planning, precise execution, and the right materials. This guide will walk you through the entire process, from preparation to the final touches, ensuring your pool looks professionally done.
Planning and Preparation
Before you start installing your Blue Gray Pattern Pool Tile, it’s essential to have a well-thought-out plan. Proper preparation will save you time, effort, and potential mistakes.
Measure Your Pool Area
Start by measuring the area where you plan to install the tiles. Knowing the exact dimensions will help you purchase the right amount of tiles and avoid shortages or excess. Make sure to account for any curves or irregular shapes in your pool.
Choose the Right Tile Type
While the Blue Gray Pattern Pool Tile is a beautiful choice, ensure it’s the right type for your pool. Check for features like slip resistance, durability, and suitability for submerged use. Some tiles are specifically designed for pool applications, while others might not hold up well in constant water exposure.
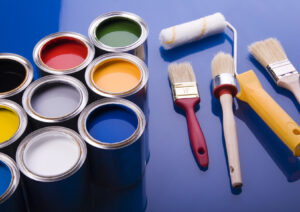
Gather the Necessary Tools and Materials
To install your tiles like a pro, you’ll need the following tools and materials:
- Tile adhesive suitable for pool use
- Notched trowel
- Tile spacers
- Tile cutter
- Grout (preferably waterproof)
- Grout float
- Sponge
- Level
- Rubber mallet
Ensure all materials are pool-friendly, as regular materials may not withstand constant exposure to water and chemicals.
1.4. Prepare the Surface
The surface where you’ll install the Blue Gray Pattern Pool Tile must be clean, smooth, and free from any debris. If you’re tiling over an existing surface, remove any old tiles or loose materials. A smooth, even surface is crucial for achieving a professional finish.
Laying the Blue Gray Pattern Pool Tile
With your preparation complete, you can start laying the tiles. This process requires precision and patience, as even a small mistake can affect the overall appearance.
Dry Layout
Before applying any adhesive, do a dry layout of the tiles. This means placing them on the surface without adhesive to get a feel for the pattern and alignment. This step allows you to make adjustments and ensures that your pattern flows smoothly, especially if you’re working with intricate designs.
Mixing and Applying the Adhesive
Mix the tile adhesive according to the manufacturer’s instructions. Using the notched trowel, spread a thin layer of adhesive on the surface. Work in small sections to prevent the adhesive from drying out before you place the tiles.
Laying the Tiles
Start from the center of your area and work your way outwards. This approach ensures a balanced design and prevents any awkward cuts at the edges. Press each Blue Gray Pattern Pool Tile firmly into the adhesive, using tile spacers to maintain even gaps between tiles.
Cutting Tiles for Edges and Corners
You’ll likely need to cut some tiles to fit around the edges or corners of your pool. Use a tile cutter for straight cuts and a tile nipper for more intricate shapes. Always double-check your measurements before cutting to avoid wasting tiles.
Checking for Level
After laying each section, use a level to ensure the tiles are even. If any tiles are uneven, gently tap them with a rubber mallet to adjust them. An even surface is crucial for a professional finish.
Grouting the Tiles
Once all the tiles are in place and the adhesive has fully cured (usually 24-48 hours), it’s time to grout the tiles. Grouting fills the spaces between the tiles, providing a waterproof seal and enhancing the overall look.
Mixing the Grout
Mix the grout according to the manufacturer’s instructions. Use waterproof grout for pool applications, as it will resist water and chemical damage over time.
Applying the Grout
Using a grout float, apply the grout over the tiles. Press the grout into the spaces between the tiles, ensuring all gaps are filled. Work in small sections and remove excess grout with the float as you go.
Cleaning Excess Grout
After the grout has been applied, let it sit for a few minutes before wiping off the excess with a damp sponge. Be careful not to remove grout from the spaces between the tiles. Rinse the sponge frequently to avoid spreading grout residue.
Final Cleaning and Curing
Once you’ve cleaned off the excess grout, let it cure for the recommended time, usually 24-48 hours. After curing, do a final wipe-down of the tiles to remove any remaining grout haze. Your Blue Gray Pattern Pool Tile should now look clean and professionally finished.
Sealing and Maintenance
Proper sealing and maintenance will keep your Blue Gray Pattern Pool Tile looking beautiful for years to come. These final steps are crucial for protecting your investment.
Sealing the Grout
Sealing the grout is an essential step, especially in a pool environment. A good quality grout sealer will protect the grout from water, chemicals, and stains. Apply the sealer according to the manufacturer’s instructions, typically with a small brush or roller.
Regular Cleaning
To maintain the beauty of your Blue Gray Pattern Pool Tile, clean it regularly. Use a pool-friendly cleaner and a soft brush to remove any dirt or algae buildup. Avoid harsh chemicals or abrasive tools, as they can damage the tile surface.
Periodic Inspection
Regularly inspect your pool tiles for any signs of damage or wear. Early detection of issues like cracked tiles or deteriorating grout will allow for quick repairs, preventing more significant problems down the line.
Troubleshooting Common Issues
Even with careful planning and execution, you may encounter some challenges during the installation of your Blue Gray Pattern Pool Tile. Here’s how to handle common issues:
Uneven Tiles
If you notice that some tiles are not level, gently tap them with a rubber mallet to adjust their position before the adhesive sets. If the adhesive has already cured, you may need to remove and reset the tile.
Grout Discoloration
Grout discoloration can occur if the grout is not mixed correctly or if it’s exposed to water too soon. Ensure proper mixing and curing times to avoid this issue. If discoloration occurs, consider using a grout colorant to correct it.
Tile Cracks
Cracked tiles are often the result of improper cutting or excessive pressure during installation. To fix a cracked tile, carefully remove it and replace it with a new one. Make sure to use the right tools and techniques to avoid future cracks.
Conclusion
Installing Blue Gray Pattern Pool Tile like a pro is a rewarding project that can significantly enhance the aesthetics of your pool. By following the steps outlined in this guide, you can achieve a beautiful, professional finish that will stand the test of time. Remember, careful planning, attention to detail, and proper maintenance are key to ensuring your pool tiles remain stunning for years to come. Happy tiling!
Feel free to submit more guest posts through Links Building Servcies - Best Prices. Buy Author Account / 1$ Guest Post Here