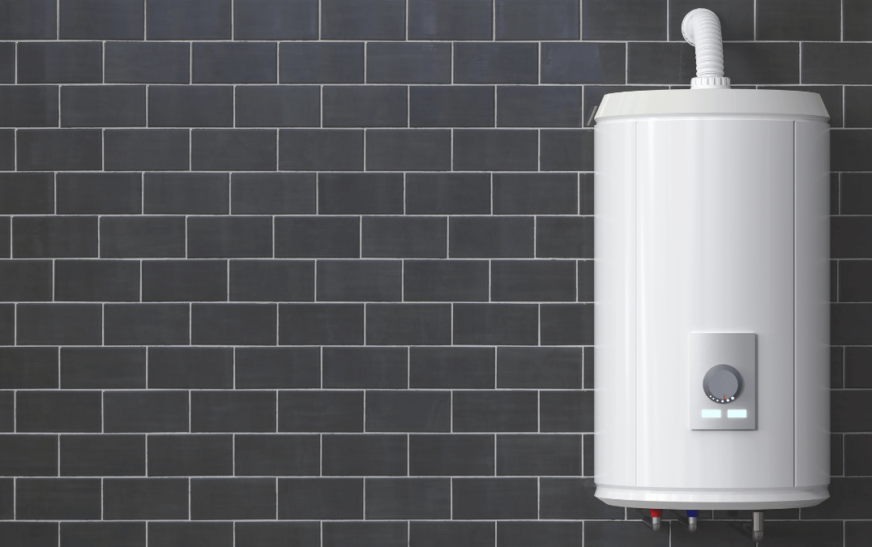
Installing a water heater may seem daunting for those who need to become more familiar with plumbing. However, hot water is essential for daily tasks such as showering and washing dishes. While hiring a professional plumber is always an option, it can be expensive.
That is why learning to plumb a water heater can save time and money in the long run. I will guide you through properly installing a water heater, from choosing the right location to connecting the pipes and turning on the gas or electricity supply.
So, whether you are undertaking a DIY project or simply want to expand your knowledge about plumbing, keep reading to learn everything you need to know about successfully installing a water heater.
Step-by-Step Guide to Plumbing a Water Heater
Plumbing a water heater involves several steps to ensure it is installed correctly and operates efficiently. Here is a step-by-step guide to help you through the process:
Essential Tools for Water Heater Plumbing
When plumbing a water heater, having the right tools can make the job much easier and more efficient. Here is a list of essential tools you will need:
- Pipe wrench
- Adjustable wrench
- Pipe cutter
- Teflon tape
- Plumbing tape
- Plumber’s putty
- Soldering kit (for copper pipes)
- Flexible water heater connectors
- New water heater
Preparation
Before installing a new water heater, it is crucial to ensure all safety measures are taken. First, turn off the circuit breaker associated with the water heater to cut off electrical power and prevent any accidental electric shock.
Next, shut off the gas supply valve near the heater to stop the gas flow. Turning off the main water supply valve is also important to avoid flooding the area. Attach a garden hose to the drain valve at the bottom of the tank and direct the other end to a drain or outside area.
Open the drain valve and a hot water faucet in the house to allow the tank to empty and facilitate drainage by letting air into the system.
Remove the Old Water Heater
To remove the old water heater, loosen and disconnect the cold and hot water supply pipes using a pipe wrench. Be prepared for residual water to spill out during this process. If flexible connectors are used, they can often be unscrewed by hand or with a wrench.
Next, remove the cover from the electrical junction box on the heater and carefully disconnect the wires, ensuring the power is off before touching any wiring. For gas heaters, disconnect the gas line and cap it to prevent leaks. Given the size and weight of the old heater, you may need a hand truck or dolly to remove it safely, and be cautious of any remaining water in the tank.
Install the New Water Heater
Position the new water heater in place. Connect it to the water supply lines and, if necessary, adjust the fittings as the plumbing takeoff service recommends. Ensure all connections are secure and leak-free. For gas heaters, ensure adequate clearance for proper ventilation to prevent dangerous gas buildup.
Connect the cold water supply pipe to the cold water inlet on the heater using Teflon tape or pipe joint compound to create a watertight seal. Similarly, attach the hot water pipe to the hot water outlet, ensuring all connections are properly sealed. Ensure the pipes are correctly aligned, and the connections have no tension to avoid future issues.
Connect the Power or Gas Supply
When connecting the power or gas supply, start by attaching the electrical wires from the power supply to the heater’s terminal block, matching the color codes (black to black, white to white, and ground to ground).
Ensure all connections are secure and insulated properly. For gas heaters, thread the gas line into the gas inlet and use a pipe thread sealant designed for gas lines to ensure a leak-proof connection. Follow the manufacturer’s instructions to install the venting system. It typically involves connecting a flue pipe to the heater and ensuring it leads to the outside to vent combustion gases properly.
Fill the Heater
Once the new heater is in place and all connections are secure, turn the main water supply valve back on to fill the tank. Depending on the tank size, this process may take several minutes. During filling, carefully check all connections at the heater for leaks and tighten any fittings as necessary.
Open a hot water faucet in the house to allow air to escape from the pipes and heater. When water flows steadily from the faucet, the tank is filled, and all air is expelled.
Test the Heater
To verify the new water heater’s functionality, turn on a hot water faucet and check if the heater is producing hot water. If needed, adjust the thermostat to the desired temperature setting.
Inspect all connections again to ensure no leaks, tightening any fittings if necessary. It is important to monitor the heater during its initial operation to ensure it works correctly and efficiently and to address any issues that may arise.
Clean Up
After confirming the new water heater is functioning correctly, clean up the work area by removing any tools and debris. Follow local regulations for disposing of the old heater, as many municipalities have specific guidelines for recycling or disposal.
Ensure that the area around the heater is tidy and that it operates properly. Proper clean-up helps maintain safety and ensures the installation area remains in good condition.
Troubleshooting Plumbing Issues in Water Heaters
When troubleshooting plumbing issues in water heaters, it’s important to identify and address them systematically. Here are some common issues and troubleshooting steps:
No Hot Water
Check Power Supply:
Ensure the water heater is receiving power. For electric heaters, check the circuit breaker or fuse. For gas heaters, check the gas supply and pilot light.
Thermostat Settings:
To ensure water safety and prevent scalding, verify that the thermostat on your water heater is set to an appropriate temperature, which is usually recommended to be around 120°F (49°C).
Heating Elements:
If you are experiencing issues with the heating function in electric heaters, it could be due to faulty heating elements. To diagnose this, you can use a multimeter to check for continuity in the heating elements.
Inconsistent Water Temperature
Sediment Build-Up:
Sediment accumulation at the bottom of a tank can impede heating efficiency. Therefore, performing regular tank flushes to remove sediment buildup is crucial for optimal heating performance.
Element Malfunction:
Check the heating elements thoroughly to verify their functioning correctly. If any issues are detected during the inspection, promptly replace them with new components to maintain optimal performance.
Discolored Water
Rusty Tank:
Rust in the tank can lead to discolored water, affecting the quality and safety of the water supply. If the tank shows signs of aging, such as rust accumulation and corrosion, consider replacing it to prevent further damage and ensure clean water for everyday use.
Corroded Anode Rod:
Ensure to regularly inspect the anode rod in your water heater for signs of corrosion. If you notice significant corrosion, replacing the anode rod promptly is advisable. This component plays a crucial role in preventing rust and extending the lifespan of your water heater.
Temperature Fluctuations
Check the Dip Tube:
A damaged dip tube in a water heater can lead to temperature issues, as it allows hot and cold water to mix, affecting the system’s overall performance and efficiency.
Examine the Thermostat:
A malfunctioning thermostat might need adjustment or replacement.
Water Pressure Issues
Check Inlet Valve:
Check that the water supply valve is completely open to ensure proper water flow and avoid potential issues.
Pressure Relief Valve:
If the pressure relief valve is malfunctioning, it could decrease water pressure, potentially causing issues with the proper functioning of connected appliances or systems that rely on consistent water pressure levels.
If you are unsure or the problem persists, consult a professional plumber or technician to ensure proper repair and maintenance.
Conclusion
Properly installing a water heater is an important skill for any homeowner or DIY enthusiast. While it may seem daunting initially, following the steps, you can complete the plumbing process and enjoy hot water in your home. Remember always to turn off the power supply and shut off the water before beginning any work, and make sure to use proper safety precautions throughout the installation. Whether replacing an old unit or installing a brand new one, understanding the mechanics of your water heater is crucial for ensuring its longevity and functionality. So mastering how to plum a water heater will benefit you in the short term, but it can also have long-term benefits for your wallet and the environment. With practice and patience, anyone can become confident in their abilities to tackle such household projects.
Feel free to submit more guest posts through Links Building Servcies - Best Prices. Buy Author Account / 1$ Guest Post Here

